
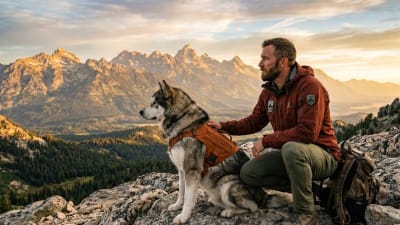
A soaked 70-pound Lab in a two-person tent is a special kind of chaos. I learned this the hard way on a rainy October trip in Olympic National Park. That night taught me drying methods that have since become standard practice.
The short answer: work in stages. Remove the bulk of water mechanically first. Then manage the remaining moisture with absorbent materials. Finally, address airflow and body heat. Rushing any stage means more moisture ends up everywhere it shouldn't.
Quick Drying Essentials
- 1A dedicated dog towel removes 60-70% of surface water
- 2Work from high-absorption areas first: chest, belly, legs
- 3Microfiber outperforms regular cotton towels for weight and absorption
- 4The shake happens regardless; control where it happens
- 5Body heat alone won't dry a soaked dog fast enough
The controlled shake
Your dog will shake. There's no preventing it. The question is where that shake happens and how much water remains for the shake to distribute.
Before entering the tent, encourage the shake outside or in the vestibule. Some dogs shake on command. Others need a trigger like touching their ears or blowing gently on their face. Figure out your dog's trigger at home before you need it in the field.
We timed the difference. A shake removes roughly 70% of loose surface water in about 4 seconds. That's significant. A dog that shakes before entering the tent brings dramatically less water inside than one who shakes after.
The vestibule is your friend here. Keep your dog in the vestibule for the initial shake. Close the inner tent door. Let them shake freely. Then proceed with drying before allowing entry to the main tent space.
The Ear Touch
Most dogs shake when you gently grasp and release their ear base. Practice at home with a wet dog after a bath. Once they associate the touch with "time to shake," you have an on-demand shake command for the trail.
Towel drying technique
Not all towel drying is equal. Random rubbing moves water around more than it removes it. A systematic approach gets better results faster.
Start at the chest. This is the highest-absorption area. Water pools here from gravity. A soaked chest keeps dripping long after legs dry. Press the towel firmly into the fur and squeeze. Don't rub yet.
Move to the belly and armpits. These areas hold water in skin folds. Lift each front leg and press the towel into the armpit. Same technique. Press, squeeze, absorb.
Now the back and sides. These dry faster naturally but still need attention. Use a pressing motion first, then finish with rubbing to fluff the fur and release trapped water.
Legs and paws come last. They're constantly touching ground anyway. Wipe between toes where mud and water accumulate. Press the paw pads.
The whole sequence takes about 3-4 minutes for a medium to large dog. We've tested quicker methods. They leave more water. The extra minute of systematic drying prevents 20+ minutes of dealing with a wet tent later.
Towel selection matters
The right towel makes a significant difference. We've tested six different options across various conditions.
Microfiber camp towels are our top choice. They absorb several times their weight in water, wring out almost completely, and pack small. A 16x32 inch microfiber towel weighing 3 oz handles a 70-pound dog adequately. Shammy or synthetic chamois towels work nearly as well. They're slightly less absorbent than quality microfiber but still effective, and these wring out exceptionally well for repeat use.
Cotton towels are too heavy for backpacking. They absorb well but take forever to dry afterward. You'd need to pack multiple towels for a multi-day trip in wet conditions, and the weight doesn't justify it. PackTowl and similar brands make purpose-built camp towels. The Original version works fine, but the Luxe version is too thick and heavy for this purpose. Match the towel to the application.
We carry two towels on trips where rain is likely: one dedicated dog towel and one for human use. The dog towel is always the larger of the two.

After the towel
Towel drying gets you about 70-80% dry. The remaining moisture is harder to remove mechanically. Here's how we handle the rest.
Absorbent dog coats or drying coats are basically wearable towels. The dog wears it, and the coat absorbs moisture continuously. Ruffwear makes a decent one, while Equafleece makes excellent drying coats that hold up well. We use this for 20-30 minutes after initial towel drying. If you don't have a drying coat, any fleece layer helps. Wrap a fleece jacket around the dog loosely. It absorbs moisture while providing warmth. We've used an old fleece vest for this purpose.
Body heat also plays a role. A dog's body heat helps dry remaining moisture through evaporation, but this only works if they're warm enough. A cold, wet dog shivers instead of generating useful heat. Ensure they're actually warm first.
The combination of absorption and body heat handles the last 20-30% of moisture over 30-60 minutes. By bedtime, they're usually dry enough that moisture isn't transferring to sleeping gear.
Protecting your gear
Even with good drying technique, some moisture remains. Your sleeping bag and pad need protection.
Dedicated dog bedding absorbs final moisture and protects your gear beneath. A packable dog bed, lightweight fleece blanket, or purpose-made dog sleeping bag works. We use a Noblecamper pad with a fleece cover. Total weight is 14 oz but it keeps our sleeping bags dry. In really wet conditions, we add a thin barrier layer between dog bedding and our gear. A piece of Tyvek or lightweight ground cloth works. This is the last line of defense if everything else fails.
Pay attention to sleeping bag placement too. Don't let a semi-dry dog directly contact your down sleeping bag. The moisture transfers immediately and destroys loft. Keep your bag elevated or covered until the dog is fully dry.
We learned the barrier layer lesson the hard way. One rainy night in the Smokies, our dog scooted off her bed and slept against my bag. By morning, my footbox had a cold spot from moisture transfer. Synthetic bags handle this better than down, but prevention beats recovery.
Down and Moisture Don't Mix
Down insulation loses 90% of its insulating value when wet. A small amount of moisture from a damp dog can create cold spots that persist for hours. If you use a down bag, be extra vigilant about keeping it separated from any remaining dog moisture.
Prevention strategies
The easiest wet dog to dry is one that didn't get soaked in the first place.
Rain gear for dogs makes a huge difference. A good dog rain jacket keeps the core dry during rain. It won't prevent leg and paw wetness, but reducing the soaked surface area by 60% makes drying much faster. The Ruffwear Sun Shower works well in steady rain, while Hurtta makes heavier-duty options for downpours.
Stream crossing management helps too. If you can lift your dog across smaller crossings, do it. Fewer wet crossings means drier arrival at camp. For larger crossings where swimming is necessary, plan timing so you have maximum drying opportunity before bed.
We try to reach camp at least two hours before sleep on wet days. This gives adequate drying time with the methods above. Arriving at camp soaked and immediately crawling into the tent creates problems that persist all night. Set up your vestibule as a drying zone. Keep the dog here during initial drying phases. This prevents interior tent saturation during the wettest part of the drying process.
The cold weather complication
Wet dogs in cold conditions present additional challenges. Evaporative drying slows dramatically. Hypothermia risk increases.
Below freezing, wet fur can actually freeze before it dries. We've had ice form on fur during particularly cold Rockies trips. This is dangerous and requires different handling.
Get the dog inside and warm first. Drying is secondary to preventing hypothermia. Use your body heat, sleeping bag around them temporarily, or an insulated jacket on the dog. Once core temperature stabilizes, proceed with drying.
Hot water bottles help in extreme cold. Boil water, fill a Nalgene, wrap it in a sock or bandana, and place it against the dog's chest. This provides direct warmth that accelerates drying.
In sustained cold wet conditions, strongly consider evacuation or sheltering in place for a day. A shivering, wet dog that can't get warm is a veterinary emergency in progress.
Emergency drying situations
Sometimes everything goes wrong. Unexpected rain soaks you both. A river crossing turns into an accidental swim. Your gear is wet too.
Prioritize life over comfort. Get sheltered from wind and precipitation. Strip off the wettest layers from both you and your dog. Wet clothing against skin accelerates heat loss.
Shared body heat works. If both you and your dog are cold, getting into a sleeping bag together shares warmth. This is a legitimate survival technique. Dogs run 101-102F normally. They're excellent hot water bottles.
Fire changes everything if conditions allow. Dry the dog by fire warmth while you work on other problems. Keep distance appropriate to prevent burns. Rotate the dog periodically for even drying.
In actual emergencies, drying speed matters less than preventing continued heat loss. Stop the bleeding first. Then address recovery.
Frequently Asked Questions
Kelly has logged over 5,000 trail miles with his dogs across the American West. He specializes in backcountry expeditions and gear testing for large breeds.