
Trail junctions are where things go sideways. A mountain biker comes around a blind corner. A horse appears on the switchback above you. Another dog rounds the bend with hackles raised. In that split second, a dog that bolts forward puts everyone at risk.
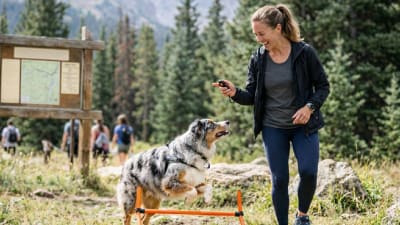
The wait command solves this problem. Unlike stay, which locks your dog in position indefinitely, wait means "pause here until I say otherwise." It's shorter, more flexible, and easier to teach. We trained Bodie, my Australian Shepherd, to hold a reliable wait at any junction in about three weeks of daily practice.
What You'll Learn
- 1The difference between wait and stay (and why wait works better on trails)
- 2A three-week training progression from kitchen to trailhead
- 3How to proof the command against bikes, horses, and other dogs
- 4Common mistakes that undermine your dog's response
Why wait beats stay for trail situations
Stay is a formal obedience command. Your dog holds an exact position until you release them. That works in a training class. On a trail, you need something looser.
Wait just means "don't cross this line." Your dog can shift their weight. They can look around. They just can't move forward until you give the okay. This makes it easier to hold when distractions appear.
The real difference shows up in how you release. With stay, you typically walk back to your dog. With wait, you can release from anywhere. You're twenty feet up the trail checking if the path is clear? You can call them forward. A cyclist just passed? Release and keep moving. That flexibility matters when you're trying to maintain momentum on a hike.
The One-Word Rule
Pick one release word and stick with it. We use "okay" but "free" or "break" work just as well. The word itself matters less than using it consistently. If you sometimes say "okay" and sometimes say "come on," you're teaching your dog to guess.
Week one: Build the foundation at home
Start with doorways. Every door in your house is a training opportunity.
Have your dog sit at the closed door. Say "wait" once, clearly. Reach for the doorknob. If they stand or move forward, remove your hand and reset. No corrections needed. Just start over.
When they hold position while you touch the knob, mark it. We use "yes" followed by a treat. Then reach again. Touch the knob longer this time. Mark and treat for stillness.
Over several sessions, work up to actually turning the knob. Then cracking the door an inch. Then opening it wider. The progression over the first week typically goes like this. Days one and two, just touch the doorknob and mark stillness. Days three and four, turn the doorknob and mark stillness. Days five and six, crack the door one inch, mark and treat. By day seven, you should be able to open the door six inches while your dog holds the wait.
The food bowl works too. Hold the bowl, say wait, lower it slowly. If they break, lift it back up. When they hold position as the bowl touches the floor, release with your word and let them eat.

Week two: Add distance and distractions
Once your dog holds a wait reliably at thresholds, start adding difficulty. But only one variable at a time.
First, work on distance. Say wait at the door, then take one step back. If they hold, mark and return to treat. Add steps gradually until you can walk across the room while they wait at the threshold.
Then add duration without distance. Have them wait while you count to ten in your head. Then twenty. Then thirty. Release and reward.
Now combine them. Wait, walk ten feet away, count to ten, return and release. This builds the foundation for trail situations where you might need to scout ahead.
The final piece is distractions. While they wait at the door, drop a treat on the floor behind them. Bounce a ball. Have someone walk past. Start with mild distractions and work up to the things that really trigger your dog.
One Variable at a Time
Adding distance AND distractions at the same time is how you break a wait. If you're increasing difficulty in one area, keep everything else easy. You want your dog to succeed at least 80% of the time. If they're failing more than that, you've moved too fast.
Week three: Take it to the trail
The jump from living room to trailhead is bigger than most people expect. New smells, new sounds, new sights. Plan for your dog to regress a bit.
Start at the trailhead parking lot. Not on the trail itself. Have your dog wait while you adjust your pack. Wait while you check the map. Wait while another hiker walks past. These are low-pressure reps that rebuild the behavior in a new environment.
On your first few training hikes, stop at every junction whether you need to or not. Ask for a wait. Count to three. Release and reward. Keep the duration short while the environment is still novel.
Watch for common junction scenarios that call for a wait. Blind corners where you can't see what's coming. Switchbacks with horses or bikers above. Trail intersections where multiple paths meet. Stream crossings with slippery rocks.
Each one is a chance to practice. And each successful wait makes the next one more automatic.
Proofing against the big three: bikes, horses, and dogs
Mountain bikers move fast and appear suddenly. Horses are large and unfamiliar. Other dogs trigger social instincts. These are the distractions that matter most on shared trails.
For bikes, practice with a helper first. Have someone ride past at a distance while your dog holds a wait on leash. Start far away and work closer. If your dog breaks, increase distance and try again. Never release them while the bike is still moving past. That teaches them to wait for motion to stop.
Horses require a specific protocol. Move to the downhill side of the trail. Have your dog wait facing away from the horse if possible. Talk calmly to the rider so your dog hears conversation, not tension. Most horses are fine with dogs that stay still and quiet.
Other dogs are the hardest. Your dog wants to greet or react. The trick is catching them before they lock on. Call the wait when you first spot another dog, not when they're already pulling. Reward heavily for holding position while the other dog passes. If your dog can't hold it, increase distance and try at the next junction.
Troubleshooting common problems
Your dog breaks the wait immediately when they see a squirrel. This means you've skipped foundation work with prey distractions. Go back to the house. Practice with toys and treats as distractions until the response is solid. Then try lower-value wildlife like distant birds before working up to squirrels.
Your dog waits but whines or barks the whole time. They're holding position but not calm. Shorten the duration. Release before they start vocalizing. Gradually build back up. You want a quiet wait, not just a stationary one.
Your dog waits at home but not on trail. The environment is too stimulating. Spend more time in the parking lot. Walk ten feet onto the trail and practice there. Extend range slowly. Some dogs need two weeks of parking lot work before they're ready for trail junctions.
Your dog waits for you but not for your hiking partner. Dogs are context-dependent. If multiple people hike with your dog, each person needs to run the training progression independently. Otherwise the command only works when you say it.
When to Use a Long Line
If your dog is really struggling with off-leash reliability, a 15-foot long line gives them space to move while you maintain control. Keep them on the long line at junctions until the wait is rock solid. Then gradually transition to off-leash work.
Making it automatic
After three weeks of consistent practice, the wait command should be mostly reliable. But "mostly" isn't good enough at a busy trail junction.
The final step is randomization. Stop asking at every junction. Ask at some. Skip others. Vary the duration. Sometimes release after two seconds, sometimes after thirty. This unpredictability keeps your dog paying attention rather than running through a memorized routine.
Watch for anticipation, where your dog starts waiting before you ask. That's good in some ways. It means they understand the context. But make sure they're still listening for your release word rather than releasing themselves when they think enough time has passed.
A solid wait transforms trail hiking. You can check around blind corners before your dog rounds them. You can let other users pass without drama. You can manage unexpected encounters calmly. It's one command, but it solves a dozen problems.
For more trail commands every hiking dog needs, check out our guide to emergency commands for hiking dogs. And if you're just getting started, our ultimate guide to hiking with dogs covers the full foundation.
Frequently asked questions
Frequently Asked Questions
Sarah is a certified canine fitness trainer with a background in veterinary rehabilitation. She focuses on injury prevention, proper conditioning, and training techniques for trail dogs.