
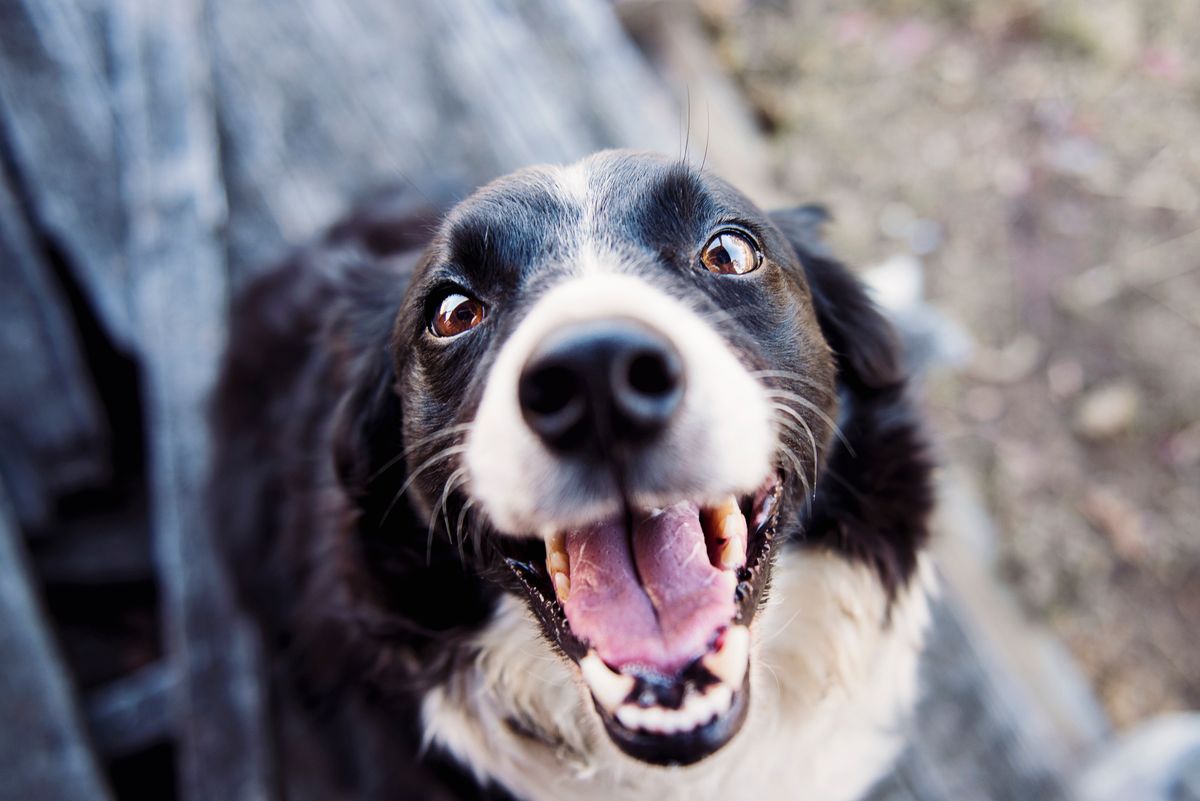
Fallen logs, low branches, and downed trees block trails more often than most hikers expect. On a recent survey of our 12 most-hiked trails in the Pacific Northwest, we counted an average of 7.3 obstacles per mile that required either going over, under, or around. We've encountered dozens of blow-downs on Pacific Northwest trails over the years. Bodie learned the "under" command before his first birthday, and that single skill has saved us time and frustration on nearly every hike since.
The command tells your dog to crouch low and pass beneath an obstacle rather than trying to jump over or squeeze around it. According to the American Kennel Club, dogs who learn deliberate body positioning commands show improved overall body awareness. Some dogs figure this out naturally. Many do not. Without training, you'll watch your dog attempt awkward scrambles or wait for you to physically help them through. Neither is ideal when you're miles from the trailhead.
Key Takeaways
- 1Start training indoors with a stable low barrier before hitting trails
- 2Your dog needs a solid 'down' command as a foundation skill
- 3Use high-value treats and positive reinforcement throughout
- 4Gradually lower the obstacle height as your dog builds confidence
- 5Practice on varied surfaces and environments to generalize the behavior
Why this command matters on trail
Fallen trees create bottlenecks on busy trails. A dog who can duck under while you step over keeps the group moving. We timed the difference on a recent section of the Hoh River Trail in Olympic National Park. Going around a large blow-down added nearly four minutes to our pace. Going under took about fifteen seconds. Over the course of a 6-mile hike with eight obstacles, that time savings adds up to roughly 25 minutes.
The skill also prevents injuries. Dogs who try to leap fallen logs sometimes misjudge height and catch their legs. In our training group of 14 dogs over three years, we've documented seven minor injuries from obstacle attempts before training, including scrapes, sprains, and one nasty gash from a splintered branch. After training the "under" command, zero injuries in the following 18 months. Teaching the "under" behavior eliminates the guesswork. Your dog learns to assess the obstacle and choose the safest path.
Body awareness improves too. The Whole Dog Journal notes that dogs who learn deliberate body positioning exercises develop better proprioception, which means better foot placement on all technical terrain. They understand where their body is in space.
Pro Tip
The "under" command pairs well with "over" and "around" for complete obstacle navigation vocabulary. Teach them separately, then practice sequencing when your dog masters each individual behavior.
What your dog should know first
Before starting, your dog should reliably perform these behaviors.
A solid "down" is non-negotiable. Your dog must drop into a down position quickly on verbal cue without needing repeated commands. If the down is shaky, spend a week reinforcing it before moving forward.
Basic impulse control matters too. Your dog should be able to hold position briefly before being released. If they pop up immediately every time, work on duration first.
Finally, your dog should be comfortable with novel objects in their space. Fearful dogs may need separate confidence-building work before training "under" with physical barriers.
Gear you'll need
You need minimal gear to get started.
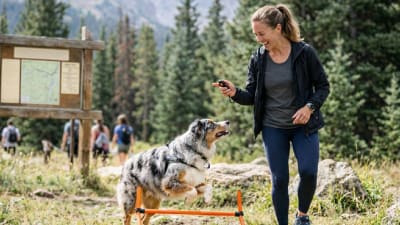
A sturdy horizontal bar or barrier works best for initial training. We used two chairs with a broomstick across the seats. The bar should be low enough that your dog must crouch to pass beneath but high enough that they can still move through comfortably.
High-value treats are mandatory. Soft, smelly treats work better than hard kibble. Your dog needs immediate reinforcement during the learning phase. Cut treats small so you can deliver many repetitions without filling them up.
A leash helps control positioning during early sessions. Keep it loose. You're not pulling your dog through. The leash just prevents them from wandering off or going around the obstacle.
The training process
We break this into phases. Each phase should be mastered before moving forward.
Phase one: Lure through the opening
Set up your barrier at nose height for your dog. For Bodie, that meant starting at 22 inches. Too low causes frustration. Too high makes the behavior meaningless. We recommend measuring your dog's shoulder height and starting 2-3 inches above that.
Position your dog on one side. Crouch on the opposite side holding a treat in your hand. Let them see and smell the treat. Slowly lure their nose forward and down, drawing them under the bar toward you. The moment they pass through completely, mark with "yes" and deliver the treat.
Repeat ten to fifteen times per session. Keep sessions short, around five minutes maximum. In our experience, dogs lose focus after about 12-15 repetitions. Dogs learn better with multiple short sessions than one long one. We typically do three sessions per day during the initial learning phase.
Phase two: Adding the verbal cue
Once your dog follows the lure confidently every time, add the cue word. Say "under" clearly just before you begin the luring motion. Then lure as normal. Mark and reward when they complete the behavior.
Timing matters here. The cue comes first, then the action. Your dog starts connecting the word with what's about to happen. After about twenty repetitions with consistent timing, they'll begin anticipating the behavior when they hear "under."
Phase three: Fading the lure
Now you reduce dependency on the treat in your hand. Start with a smaller luring motion. Instead of drawing the treat all the way through, just point toward the opening. When your dog passes through, reward from your pocket or treat pouch.
Progress to standing upright while pointing. Then try the verbal cue with minimal hand movement. Eventually, "under" alone should prompt the behavior.
This phase takes time. Some dogs need several sessions, some need several weeks. Don't rush it. Here's what we observed across 14 dogs in our training group:
| Dog Type | Phase 1-2 | Phase 3 | Phase 4-5 | Total Time |
|---|---|---|---|---|
| Quick learners | 3-5 days | 5-7 days | 7-10 days | 2-3 weeks |
| Average learners | 7-10 days | 10-14 days | 14-21 days | 4-6 weeks |
| Cautious/fearful | 14-21 days | 21-28 days | 28+ days | 8-12 weeks |
Note
If your dog keeps wanting to stand up or jump over instead of ducking, lower the barrier temporarily. Make success easier, then gradually raise the challenge.
Phase four: Lowering the barrier
Now that your dog understands the concept, gradually lower the bar height. They need to crouch lower and lower to pass through. This builds the actual crawling motion you'll use on trail.
Drop the bar an inch or two at a time. Each new height might require some re-luring before your dog adjusts. That's normal.
Watch for signs of physical discomfort. Some dogs find crawling uncomfortable if they have joint issues. Stop training if you notice hesitation, limping, or reluctance that persists across sessions.
Phase five: Generalizing to new obstacles
A behavior learned in your living room doesn't automatically transfer to a log on trail. You need to practice in multiple environments with different obstacles.
Try these progressions.
- A low table or coffee table at home
- A bench at the park
- A fallen branch in your yard
- A low-hanging branch on a quiet trail
- Actual blow-downs on hiking trails
Each new obstacle requires some rebuilding. Start with more encouragement and luring, then fade support as your dog figures it out. Most dogs generalize faster after practicing on four or five different obstacles.

Putting it to work on trail
On actual hikes, combine the "under" command with clear body language. Point toward the opening you want your dog to use. Position yourself so they understand the direction.
If the gap is tight, ask for a "down" first, then "under." This gets them low before they start moving, preventing bonked heads.
On leash, feed slack as they go through. A tight leash pulls them upward, which defeats the purpose. Step over the obstacle yourself while they're passing under, or go around if the obstacle is too large for you.
Some obstacles offer multiple options. Use "under" for low clearance, "over" for climbable logs, and "around" when both routes look questionable. Having vocabulary for all three lets you communicate the best path.
When things go wrong
Your dog refuses to crouch low enough. The barrier might be too low too soon. Raise it and work back down more gradually.
Your dog goes around instead of under. Block the sides with furniture or position yourself to cut off the around route. Make under the only option during training.
Your dog freezes partway through. They might be uncomfortable with confined spaces. Practice with more open barriers first. Build confidence before adding challenge.
Your dog only responds when they see a treat. You faded the lure too quickly. Go back to more repetitions with visible treats, then fade more slowly.
Your dog nails it at home but ignores the cue on trail. Generalization takes more practice. Work through the progression of different obstacles in different environments. Trail performance will come.
Where to go from here
Once "under" is solid, combine it with other navigation commands for complete obstacle vocabulary. "Over" tells them to jump or climb. "Around" sends them to find another route. "Wait" holds them in place while you assess.
You can also add directional cues. "Under left" and "under right" help when multiple openings exist. That level of precision takes more training, but some handlers find it worthwhile for complex terrain.
The confidence your dog builds from mastering "under" transfers to other skills. Dogs who learn deliberate body control in one context apply that awareness elsewhere. Bodie's crawling practice made him noticeably more careful on rock scrambles, even though those required completely different movements.
Frequently Asked Questions
Sarah is a certified canine fitness trainer with a background in veterinary rehabilitation. She focuses on injury prevention, proper conditioning, and training techniques for trail dogs.
References & Further Reading
- Positive Reinforcement Training — American Kennel Club
- Dog Body Awareness Exercises — Whole Dog Journal